Nuffnang~

Tuesday 3 May 2016

Frequently asked questions about wisdom tooth


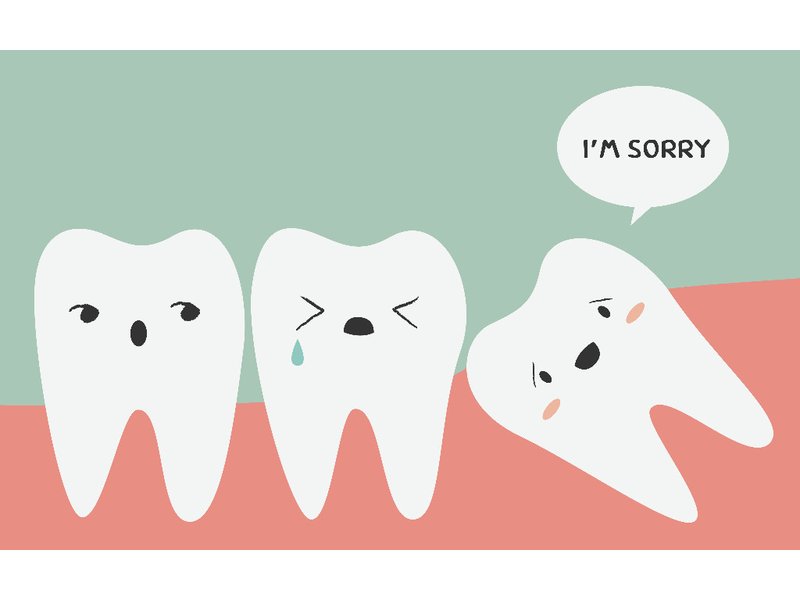
Types of wisdom tooth


1) What is the age your wisdom tooth should erupt?
2) How if my wisdom tooth is not erupted within this age range?
3) Do you have to worry if your wisdom tooth does not erupt at all?
4) Why is eruption of wisdom tooth so complicated?
5) What is the cause of pain in wisdom tooth?
6) When to extract/remove a wisdom tooth?
7) What is the procedure in extraction of wisdom tooth?
8) What are the precaution after the extraction?
9) What are the complications of extracting wisdom tooth?
10) Management of complications after surgery

1) What is the age your wisdom tooth should erupt?
- 17-21 years old


2) How if my wisdom tooth is not erupted within this age range?
- This is really common. Just be patient. I'm 25 and my wisdom tooth is still not out yet although it is fully formed when seen under x Ray.


3) Do you have to worry if your wisdom tooth does not erupt at all?
- There is nothing to worry about. Some people are born without wisdom tooth. Some has fully formed tooth but it never erupts and stays in the jaw. There is although a possible risk of developing a cyst (dentigerous cyst) if it remains inside the jaw but the possible complications of the extraction overall outweighs the risk.


4) Why is eruption of wisdom tooth so complicated?
- This is because there is not sufficient space in the jaw for the tooth to erupt. Therefore it is stuck halfway and erupts partially. It may also be due to the position of the tooth bud before the formation of the tooth. Of course there are also many other reasons for this unpredictable pattern like density of bone, chronic inflammation, and so on.


5) What is the cause of pain in wisdom tooth?
- The pain is usually due to gum inflammation. As the wisdom tooth area is right at the back of the jaw, cleaning of the area might be difficult. Further more when the tooth is partially erupted, food tends to get stuck in the space created between the gums and tooth. If the area is not properly cleaned, the food gets fermented and bacteria grow in that region consequently causing gum inflammation. If it is not treated, the gums swells up and you might get abscess in that area causing intense pain in the back of the jaw radiating to the ear.


6) When to extract/remove a wisdom tooth?
- Basically when it causes a long term discomfort, it's time to get it removed. In most of the cases, due to the constant food impaction in that area, it causes the tooth in front of it, which is the 2nd molar to have decay. Therefore to remove save the 2nd molar we have to remove the cause which is the wisdom tooth.
- if it doesn't cause any pain or discomfort and cleaning of that region is adequate, it doesn't need to be extracted.

- examples of when to remove the tooth:
a) follicular enlargement (cyst formation)
b) pericoronitis (inflammation of gum surrounding the tooth
c) non-restorable carious lesions (extensive decay of tooth which cannot be treated)
d) resorption and decay of adjacent teeth


7) What is the procedure in extraction of wisdom tooth?
- Local anaesthetic administration
- Gums around the wisdom tooth will be reflected.
- Some amount of bone will be removed to increase visibility.
- Extraction of the wisdom tooth
- Wound closure or suturing of the gums.


8) What are the precaution after the extraction? (applies for extraction of any tooth)
- Bite down gently but firmly on the gauze packs that have been placed over the surgical areas for 1 hour. Replace the gauze and bite for another 30 mintues.
- Do not smoke after surgery for at least 1 week.
- Do not rinse or spit vigorously or probe the area with any objects.
- You should brush your teeth the night of surgery, but be gentle around the surgical sites.
- Do not use a straw for the first few days after surgery.
- Avoid extremely hot foods.
- Take cold food.
- Avoid chewing food until tongue sensation has returned.
- Avoid food which may get lodged in the socket areas.
- Eat any nourishing food that can be taken with comfort.
- Exercise should be avoided for 3-4 days following surgery.


9) What are the complications of extracting wisdom tooth?
Complications which may happen during the surgery:
- jaw fracture
- damage of adjacent teeth, tooth
- tooth fragments displacement into soft tissues and bleeding. 
- inferior alveolar nerve injury causing paresthesia (altered sensation) or anasthesia (loss of sensation) in the region of the skin of the mental area, the lower lip, mucous membranes, and the gums
- lingual nerve injury leading to numbness of the anterior two thirds of the tongue and taste disturbance on the same side of surgery area.

Typical complications after the surgery:
- pain
- swelling
- bruising
- trismus ( limitation in mouth opening)
- osteitis ( inflammation of bone)
- surgical site infection/ non healing socket


10) Management of complications after surgery
- Minimal bleeding will occur after surgery, for 24-48 hours after surgery. 
Placing a gauze pack over the area and biting firmly will control bleeding. Salt water rinses may begin 24 hours after surgery (mix 1 tablespoon of salt with 8 ounces of water.) Swish gently and allow the water to drip into the sink. Rinses should be done 2-3 times a day, especially after eating.

- Swelling can be minimized by using a cold pack, ice bag or a bag of frozen peas wrapped in a towel and applied firmly to the cheek adjacent to the surgical area. This should be applied 20 minutes on and off during the first 24 hours after surgery. 
There will be discolouration or bruising of face which is blue, green or yellow appearing 2-3 days after surgery. Beginning 36 hours after the surgery, apply moist heat over the area.

- There will also be pain after the surgery. You will usually have a prescription for pain medication. 

- Limitation in opening the mouth wide for a few days after surgery. This is a normal post-operative event that usually resolves during the week after surgery. Stretching these muscles may help to speed up resolution of this problem.

*** If bleeding, swelling, pain persist even after 3-4 days, you should consult your dentist.


Thanks for reading, xoxo


Friday 18 March 2016

Steps to healthy looking teeth and gums!


photo credits to www.mymilktoof.blogspot.com
click the link to their page! *cute pictures alert*


Hey guys! Figured that as a dentist I should contribute a little on spreading oral health care so I'm going to share with you the basic steps in my oral health care routine to achieve healthy teeth and gums. ( It will be written in laymen's term and simplified for easy understanding)

First, you need to know a little bit about how tooth decay is formed:


Basically this is what happens when you consume dietary carbohydrates, the bacteria which are present in your mouth will ferment the food to produce acid. The acid produced are responsible for tooth decay.
However, these bacteria cannot just stick on the teeth like that. They need a medium to stay on and this medium is called plaque.

1) TOOTH BRUSHING


What does tooth brushing do? It removes bacteria in form of plaque.

Brushing my teeth is the first thing I do every morning. It may sound like a common sense but there are more than a handful of people who brushes their teeth after taking their breakfast. This is a very very bad habit and it may actually be the cause of you having tooth decay.

The reason for this is, imagine when you are sleeping, there will be decrease in salivary flow, so all the good stuff that the saliva is doing including flushing the bacteria, buffering the pH, remineralizing the tooth are all gone.

When you wake up in the morning, there will be super large amount of bacteria present in your mouth in form of plaque. Not knowing that, you will happily carry these bacteria in your mouth to share your breakfast with! Yuck! So all the bacteria will be eating the carbs that you take in and turn it into acid which eventually dissolves your tooth structure forming a decay.

So please brush your teeth first thing in the morning!!

The right way to brush your teeth:


* reminder: 
- choose a tooth brush with soft bristles and increase your brushing time instead of shortening your brushing time by using hard bristles.
- brush 2 times a day and rinse your mouth after every meal.


2) FLOSSING


I know I know... Flossing can be a difficult routine to follow everyday. But for those pretty ladies and handsome boys out there who spend hours putting on skin care and masks, you can take 1 minute of that time to do some flossing can you?
Why do you need to floss? Tooth brushing removes most of the plaque on the tooth surface. But it cannot remove plaque between the teeth. Why do you always have decay between the teeth? This is probably the reason.


Practice makes perfect!
One minute flossing technique:


Some people have large gap or holes between their teeth. If you are one of them, instead of flossing, you need to use something called an interdental brush.


For this you have to choose the correct size which is suitable for your teeth. Don't ever buy a brush which is bigger than the space between your teeth. It will damage your teeth.
If you are wondering where to get this... You can get it from DAISO for rm5.30 for 4 brushes. Choose the correct size! Or you can get it in any dental clinic with a more expensive price :D


3) TONGUE CLEANING

People often neglect their tongue hygiene. Some of the cases of bad breaths are actually due to not cleaning the tongue properly. The tongue also serves as a reservoir which harvest bacteria and food debris. So make sure your clean your tongue!

How to brush your tongue:


4) MOUTH RINSE

Mouth rinse is the also important if you wanna complete the whole routine. Based on my personal experience, mouth rinse does help in many of my dental problems including sensitive teeth and inflamed gums.
After tooth brushing and flossing, your teeth should be nice and clean. however there will be still some areas that you can't reach. For example the back of your last tooth, your wisdom tooth and so on. Therefore you need a mouth rinse to remove the remaining bacteria, to provide fluoride which strengthens your teeth and freshen up your breath.

What I will recommend is an alcohol-free mouth rinse. (As the alcohol ones may cause dry mouth and research is undergoing on whether it has a relation with causing oral cancer or not.)


Colgate plax range claims to be alcohol free. As for Listerine, they recently came out with listerine zero which is alcohol free. Listerine green tea which Im currently using and in love with its flavour, is also alcohol free ( stated in the ingredient section).


LASTLY,
Visit the dentist every half a year to get a dental check up or scaling done. This will help you save a lot of money compared to going to the dentist when you have a tooth decay to do filling, root canal, crowns, implants and so on.


Thats's all for routine oral health care. Although there are more high tech stuff and all. but stick to the basics! That is all you need! 

Leave me comments below on any questions you wanna ask on oral health and topics that you want me to address on as I will be writing a post on FAQ about dental health.


Thanks for reading! xoxo


Sunday 13 March 2016

Product review : Loreal lip and eye make up remover


Packaging
Not very big. Easy to carry around.
Cap is tight and doesn't spill when I brought it to travel.

Smell
No smell at all which is good as I'm fear of fragrances or chemical that is a burden to my sensitive skin.

Applicator 
Use a cotton pad and pour the amount of make up remover desired.
I usually use 1 cotton for my foundation, and subsequently 1 cotton for both my eyes when I'm wearing light make up. Use 1 cotton for each eyes if u wear heavy make up

Texture
It's oil make up remover. Many feels that oil remover clogs up the pores which I couldn't determine whether it's true or not. But if you are afraid so, then just use it for your eyes and lips not your skin.

Ease of use
It removes make up very efficiently. Although nowadays people opt for other means of removing make up such as water based make up removal, the oil based one's are still the best make up removal. 

Pros and cons
+ removes make up and waterproof mascaras efficiently
+ no irritation to eyes, no burning sensation
- slight blurring of vision when it enters the eyes
- may clog pores

Summary
It's a good product for its price. I usually use this when I'm wearing thick make up as it removes nice and clean.
I'm currently trying out Shu uemura's make up removal that is much raved about as I usually put on only sunscreen not full foundation. Will blog about it soon.

Details
Size 125ml
Price rm 23.65
Made in Indonesia

Product review : Naked urban decay eye shadow (Basics)


Packaging
Small and simple. Easy to carry around and is durable so it wouldn't crack when you drop it accidentally.

Applicator 

It doesn't comes with an applicator. The easiest method is to either use your finger or using an eyeshadow brush.

Texture

It's powder based. Very powdery in fact. Therefore using your finger to apply might be better to prevent thick powdery makeup on your eyes.
The Venus colour has very fine shimmers in it which is great for highlights.

Coverage
The colour is not very vivid except the black one. Therefore repeated application is needed to achieve the desired colour gradient.

Colour
I love the colour from this palette as earth colours are always my favourite. But I do prefer some glitters in the Brown colour as well instead or just the venus colour. But there are other naked palette with glitter colour selections.

Summary
Overall it's quite a good product for daily simple make up use. But it's requires repeated applications of the colour to be vivid. Therefore I would prefer Kate eyeshadow than this.

Pros cons
+ simple  basic colours
+ good for everyday make up
+ easy to use to highlighting and contouring of eye shape.
- colours are not vivid enough.
- requires few applications the achieve the depth of colours needed.

Details
Price rm118.00
Made in USA

Product review : Étude house Acne cleanser

Hey guys! Today I'm gonna introduce you to the best cleanser that I've ever used!!
Étude house acne foam cleanser~


Packaging
Comes in a large tube. It is quite hard to squeeze out coz the consistency is really thick.


Smell
Doesn't smell good. It's like sort of a medicine smell which I feel like my skin is treated every single time I use~


Applicator 
No applicator. Squeeze out about 1cm of the cleanser on your palm, mix with some water and rub into an even leather.


Texture
Bubbles:
Not much bubbles. Especially when your face is oily, the bubbles will just disappear right when it touches your face. Then you can either wash once more or add more cleanser. It feels like the cleanser reacts with the oil?? Not very sure.

After effect:
Although the bubbles are less, the cleansing effect is not reduced at all. It leaves the skin non oily, clean and dry without tightening of skin. It also controls sebum production! Usually my skin get really oily after around 2-3 hours. After using this, it lengthens the time before the skin becomes oily, around 4-5 hours?


Ingredient & Function
Salicylic acid
Non comodogenic. Which means it wouldn't cause pimples.


Summary
This product is great for those with oily skin. Introduced this to my friends and brother, they say it really worked in reducing sebum production. You know when you have oily skin, dust and whatever it is tends to stick onto your skin and into your pores. As time goes by, it forms black and white heads. And when these gets infected, it will cause inflammation and forms pimples. Therefore when you have less oily skin, you will have less pimples!

Pros cons
+ removes oil
+ cleanses skin thoroughly
+ decrease sebum secretion
- dries out skin
- not suitable for dry acne skin 


Details
Size 150ml
Price rm49
Made in korea

Product review : Bobbi brown corrector


Packaging
It's simple and classic looking. Very small and light. You can just toss it in ur bag to touch up your make up anytime! It also has a tiny mirror in it in case you can't go to toilet for touch up.

Applicator 
Doesn't come with an applicator. I suggest applying it with a concealer brush. You can also use your finger.... But dust will get stuck in it and its so hard to take them out without scooping and wasting loads of the concealer. So.... Just go get a brush xD

*reminder : Keep it in cool place. I've tried putting it near some warm place and it turned into this soft, creamy, oily texture. It'll turn back to normal after it cools down.. But I think it will loose its original structure, coz it happened to mine. New ones always seem to have better coverage, i think its becoz of this haha~

Texture
Stickiness: 
very thick and creamy. Therefore better coverage. Recommended to conceal pimples, blemishes, moles.

Moisturising effect:
Smooth and doesn't flake. Not dry upon application, but after around.... 2-3 hours the skin starts to dry up and it will start to flake. So bring it out with you if you are planning to go out for long hours.

Coverage
I would say quite good. Had been using this for 5 years. I use this as eye concealer (but it's recommended to use liquid ones on eyes) But my skin is very dry now, including the skin under my eyes, therefore it doesn't really stay and it will have this wrinkly appearance after few hours when it dries up. So I think it suits moisten skin better. Using it on other parts of the face is okay though.

Colour
I'm using Light peach. It's a little pinkish and suits my skin better. I've tried Natural before this, it's too yellow for my skin. Make sure you choose the correct colour for your skin tone! Ask for help from the counter lady~ They will help you match your skin colour. It's best to get a tone lighter than your skin tone if you have very dark eye circles like me~

How long will it last
As I mentioned earlier, it dries up after 2-3 hours and you havta reapply it. However, if you skin is moist, you apply moisturiser and all, then it will last longer. But of cos on oily skin, it's like any other concealer, when it gets oily, it will start to be diffused at the margins. You can use oil blot to clear off the oil first then reapply.

Ease of application
Very easy. If I'm rushing I usually use my finger n just dap it under my eyes. Super fast and easy to blend out. Will not leave patches~


Summary
It's really good. Tried a few cheap and expensive concealer and always comes back to using this. Works well especially good for emergency situation where you need fast touch up on your make up.

Additinal Details
Size 
1.4g
Price
Rm95?
Made in
USA

Pros cons
+ small packaging, easy to carry around.
+ thick consistency, coverage is good.
+ doesn't really flake unless you have dry skin.
+ wide range of colour to choose the best suitable colour for your skin.
+ very easy application, even comes with a tiny mirror for convenience.
+ blends out well, will not leave patches.

- dries up skin relatively fast.
- repeated application needed
- not suitable for dry skin and for use under eyes.
- pricey

Feel free to drop me comments :)

Thanks for reading! Xoxo~

Product review : Dolly wink brow kit

Today I'm gonna review on dolly wink brow palette.
Drawing brows is actually one of the most important step before I step out of the house. I actually can't leave the house without drawing my brows coz I'll look so different although I do have quite a thick pair of brows.
 But the thing is, I don't like brows which are really drawn on like with brow pencil. It's so unnatural. So I had been using brown eye shadow to colour my brows. Thank God some one invented something called brow powder! It can be used as eye shadow too! 


Packaging
Comes in a small black oval palatte. A Dolly wink brow kit actually comes in 2 colours. 
The dark 1 is to colour your brows as the base colour while the light 1 is to brush onto your brows as a finishing coat after the dark colour to make the brows look smoother. The light 1 can be used as a nose shadow too!


Applicator 
Comes with a small brow brush. Bristles are quite hard, you wouldn't need to use a separate brush to comb your brows.


Colour
The brow kit is available in 3 types of colour combination to match different hair colour. The palette I chose is the darkest as I have black hair right now. 
The colour is quite pigmented, non glittery, which is great to create natural looking brows! If you want a darker colour just go over the area a few more times.

Reminder: apply the colour before using eye brow pencil. Fill in the bald spots with the brow shadow and then outline the brows with the pencil. Brush on the lighter colour to create a smooth brow effect.


Ease of application
Easy. Just a few strokes and your brows will look thicker and tidier.


Pros cons
+ moderately pigmented, creating natural looking brows.
+ small and easy to carry around.
+ easy to use
+ colour stays on for 5-6 hours.

Details
Price: rm 41.00

Made in:
Japan

Summary
I really love this product. It is so easy to use and the colour stays on throughout the day. It can also double up as a nose shadow powder using the lighter colour one.

Product review : Maybelline the Falsies Volume Express mascara

Do you want a pair of beautiful eyes with long and voluminous eye lashes? Read on to find out how you can achieve this look without the help of fake lashes!


Claims

Packaging
It comes in a sexy purple colour! :D with lace details~ fusiform shaped, easy to hold without dropping it ( I have butter fingers heh ;) )


Applicator brush
The brush is the soft classical type, criss crossed nylon bristles. It has a curved spoon design to it which will adapt better to the curvature of the eyes. There's even a friendly note here saying : use spoon brush with this side against lashes. How sweet~

*reminder : 
Texture
Fibre:
Loads and loads of fibre!! Super rich. It's like every stroke fills your lashes with fibres but they are not heavy at all! It won't make your lashes droopy. So amazing!

Consistency:
Very thick. Dries up fast, around 3-4 secs. No worries on smudging onto lower lids when you accidentally blink your eyes :) I bought the one in Black Drama. seriously damn black and dramatic LOL. me likey!! Great for creating dolly look!


Water proof
This might be the only negative point. Sadly It's not water proof :( I didn't know coz my sis bought this for me. Then I went to bathe without removing my make up. When I came out of the bathe room I got the shock of my life -.- looked like those girls who cried with mascara in the show xD and did I not already mention it's DAMN BLACK? Hahaha. Imagine that. I nearly got a heart attack -.-


Smear/smudge proof
I think it's quite smudge proof for a non water resistant mascara? Worn it to prom when I still had oily skin, it did not smudge even a little to my lower lids :)


Fix
What I LOVE about Maybelline mascaras is that they fixes your lashes in place so well!! Like if you curl your lashes nicely, it will take up the shape, will not make it droop even abit! Drooping is the thing I hate the most! Coz I spend alot of time curling my lashes and make sure it's in good shape before I apply mascara on. This is my 3rd Maybelline mascara and it still works like magic. I've tried many super branded and expensive mascaras which still droops your lashes. Quickly go get a Maybelline mascara right now if you have drooping problem!!


Ease of application
To be frank, it's a little harder to apply than the other Maybelline mascaras I had. Coz the bristle are abit too long. Applying Upper lashes is okay, but when it comes to lower lashes, it's really way to big! Even how careful I apply it will still get my lower lids. My advise is either use a card to block your lower lids beneath the lashes when u apply or use a comb type brush. I use the comb type brush from my Maybelline Cat eye series. It's okay too if you wanna just use it for upper lashes and use other for lower lashes. But the long and rich fibres look really nice and will definitely volumize you lower lashes!!


How to apply?
To get the long and dramatic lashes, follow these steps:
Apply in zig zag motion at the roots of the lashes. ONLY THE ROOTS!
Then pull out, upwards and straight direction.
Repeat the steps for the other parts. 
Make sure you follow the fan shape of your lashes. Front lashes brush toward head of your eye brows. Middle forward outwards. Back lashes outwards towards tail of you eye brow.


Pros cons
+ sexy packaging, easy to hold.
+ Brush is soft and can be manipulated relatively easily.
+ Tons of fibre! Totally double up the amount of lashes you have!
+ Dries fast, no mess.
+ Dark, opaque colour, thick consistency.
+ smear and smudge proof.
+ Fixes curled lashes shape brilliantly!

- Kinda tough for application on lower lashes.
- Not water proof :(


Details
Size
8.2ml
Price
Rm35++?
Made in
Italy~


Summary


I really love this mascara!! One of the best I've ever used. Maybelline mascara rocks! :D

Thanks for reading~ xoxo!

Sunday 27 October 2013

Ways to remove stubborn blackheads

When I was in secondary school, I had pimples and blackheads. I didnt know how to remove them so my mom ended up pressing them out for me.
As I had little knowledge about stuff like that, I just let my mom remove them every week. Before I know it, the pores on my nose became really huge and deep.
Coz of that, more dust and dirt which sticks on my oily nose tend to accumulate in the pores. And now, I have this what people known as "strawberry nose"

It's really depressing, even make up couldn't cover them.
I thought there was no way of returning the elasticity of the pores. I had tried many products including nose strips, pore minimizing toner and all but nothing seems to work.

Then only I realize, this is a battle of hardwork and patience. It can't be achieved in few days, but takes months of maintenance.
The trick is you havta show some effort on your face everyday, not just relying on nose strips during the weekend.
So now I'm gonna share the products that i use right now in attempt to remove the blackheads and return the pores to normal size.


1) Removing make up
Usually, I only apply sunblock and concealer on my face to college. I felt like there was no need in using a make up remover to remove my make up everyday as it is not thick.
This is where i was wrong. Even sunblock gets into the pores right? And sunblock is actually water resistant which means washing your face doesn't actually remove them.
Therefore, I suggest using make up remover every night before washing your face. You can use a water based make up remover so that it is not harsh on your face but cleanse relatively well.

eg: Bifesta make up remover which I reviewed here. I actually using the range for dull skin now. Not oily at all! Love it!


2) Cleansing
This is the easiest and most important part. Don't be lazy and wash only with water. Imagine all the dust which are on your face after a long day out! Therefore I make it a point to wash my face right after returning home from college.

The cleanser I recommend:

Etude house AC clinic daily Acne Foam Cleanser


My favourite cleanser! I use this when I had acne last time. It worked really well in controlling sebum production. On top of that, It doesn't dry up the skin or makes the skin tight after washing.
Love this a lot and had been recommending it to my friends and family with acne problem.
The only problem was, when your face is oily and you wash it with this, the bubbles miraculously disappear and you had to apply more to cleanse it.
I don't really know why, but even if the bubbles are gone, it still manage to leave the skin feeling clean after washing. But I do suggest adding extra cleanser to make sure the face is really clean.


Etude house Baking powder pore cleansing foam


Bought this the other day. I found this really good! It's now my 2nd favourite cleanser now. It has minute baking powder which dissolves in contact with water. As it is pore cleansing foam, I felt like it really gets in deep into the pores to remove the impurities. Plus, It creates rich foam which consist of really tiny bubbles that penetrates into the pores better.
It doesn't have the disappearing bubble problem therefore I use this after college when my face is really oily and the acne cleanser in the morning when it is not really oily.
Will do a review on this along with the acne cleanser when I have time.

3) Exfoliating
Choose a gently scrub for daily exfoliating. Cleansing is not enough as dead skin constantly build up.
I love exfoliating! It leaves the skin really smooth~ but remember only use daily scrub if you plan to exfoliate daily so that you wont over do it and injure your skin.

What I use for exfoliating are:

Olay PRO x


Got this in Taiwan for a relatively cheap price with free extra brush!


Favourite exfoliating agent! Use this everyday with my cleanser and occasionally with the exfoliating cleanser they provide which doubles the cleansing effect! It also massages the skin.

Ginvera marvel gel


Used this before I got the Olay PRO x. Doesn't remove dark spots, but it does remove make up residue. It is really mild and gentle therefore daily use is okay for the skin.

Etude house magic bubble peeling wash


Haven tried this, it was on sale the other day. Got it for less than half the price? :D

NRK Konjac mild peeling gel


This is actually sort of like the Ginvera marvel gel. But is like harder to rub off and might cause a little peeling if you rub too hard. So i suggest using this only once a week or something.

St Ives Bright skin apricot scrub


These are a little harsh for the skin. The granules are very huge. But great when you feel like your skin is really dirty and coated with dead skin.

Biore pore strips
Daiso Pore strips


Daiso pore strips has more adhesive property. Pore strips and great in removing black heads but only superficially.

Therefore I went to buy this:

Sexy Look blackhead pore set


 Got this in a buy 1 free 1 promotion in Taiwan :D


This is how it looks like:
*
*
*
*
*


I know it looks ugly. lol~ nobody looks good in facial masks -.-

These are great as it is in a gel mask form which can adapt better to the skin and removes blackheads more effectively especially those areas of nose folds where nose strips always fail to remove. And it smell exactly like the strawberry yogurt I use to eat! Yum~
It even comes with softening serum and pore minimizing serum to close up the pores.

4) Toner
I'm still yet to find a good pore minimizing toner. Mean while still using Etude house wonder pore toner. You can read the review here.


Toner containing alcohol is good for minimizing the pores but not suitable for sensitive and dry skin. Prolonged used will coz thickening of skin too therefore daily exfoliation is crucial.

5) Make up base/ primer
To prevent make up residue clogging the pores, use a primer or make up base. There acts as a protective layer.
I using Rimmel fix and perfect pro primer which also smoothens my skin and makes foundation application much easier.


I'm still trying to minimize the pores and remove the blackheads. It takes time as the pores were already there for a long time. Hopefully this help you guys in choosing the correct products which suits you the most.

Thank for reading~~ xoxo!